The Parkmaker's Guide:
Gap Filling
Alright, you've just finished building your architecture in a remote corner of your park, and quite frankly, you're very proud of it. But, there's a problem. You notice that there are small "spaces" that you still need to fill in. What do you do to fix this predicament? You may already know the answer.
Some may call it cutting corners, but I like to call it "gap filling," and everyone does it. Gap filling is a method of painting in the blank areas to give the park a finished look. Without it, the park would be 100% architecture, rides, and paths. Sure, it'd look great if you could pull it off, but that would be a challenge. So, I've assembled the best ways to make those annoying little spaces look great without much effort.
Trees
Trees are probably the most common method of gapfilling. This technique simply uses mother nature's architecture as a means to easily occupy space. However, there's a right way and a wrong way to do this.
Wrong Way:
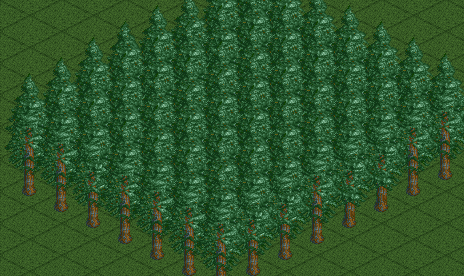
The WRONG way to do trees is above. This is the same, monotonous tree on every space that's not only unattractive, but also more work than expected. The land is flat, and the tree height is the same. This doesn't belong anywhere in an expert park.
Right Way:
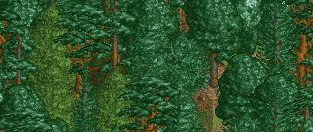
This is the RIGHT way to do trees. Although the picture doesn't show much, it has many different kinds of trees at different heights and different colors. The trick is selecting about 6-10 trees that accompany the theme to your park. Once you have your trees selected, make small hills and slopes where you want to plant. This creates a small height difference with various trees, causing it to look more interesting. Lastly, randomly place all your selected trees without cluttering the same type at the same spot. Picture it as though it were a can of mixed nuts. It should look very blended and equal without the same nuts touching each other all the time.
Bushes and Shrubbery
They're small and rather insignificant compared to trees, but if mixed properly, they can become a strong accent to any location in your park. But just like trees, there's a right and wrong way to attempt this.
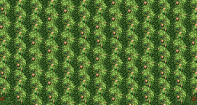
This is just like the wrong way to place trees, only this time we're talking bushes. Again, the same object is placed over and over again over a flat surface. Very boring and plain.
If you want to do bushes and shrubbery correctly, you have to think of it similarly to trees. Select a sample of small plants you like and begin placing them randomly as mentioned earlier. Because of their small nature and lack of body, this will look more spaced out and not as thick as trees. That's to be expected, and can still be done properly with a great fill to the gap.
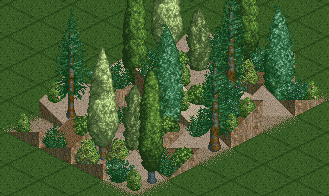
A common varied version of gap filling with shrubs and bushes is to include trees to keep them company. If you decide to choose this technique, be sure to use smaller trees and really shred it up with the land tool. Another nice add-on to this method is including small tree-like scenery as well, such as the Roman or Egyptian columns. If you're still stuck, try using the below sample for reference.
Water
Ah, the gentle supplier of life. As it turns out, this human essential also makes a great gap filler for certain areas with certain themes. If you have a forested or garden-oriented theme, a quiet river beside the old mill is a helpful choice. Have a doomsday park? Perfect. Some patches of orange "lava" adds to the exciting thrill of an exploding volcano. Roman park? Add a few aquaducts to bring that authentic feel. You name it and water has a solution for it.
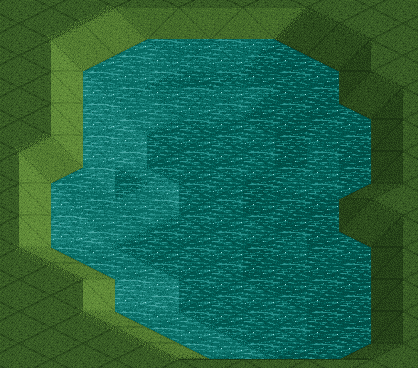
Although, when using the water tool, use caution. Nobody appreciates a square lake with four rigid corners and no gradual slope. The goal of making a lake is to end up looking as natural as possible. The land tool for the scenario editor works best because it can create hills easily. Although, if it's too late for the scenario editor, various trainers can also help (use at your own risk). Below is an example of a natural-looking lake.
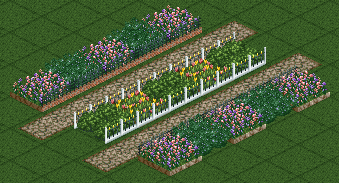
This can be a gap filler in multiple ways. If you want to add more "gap filled" space to the park overall, this is perfect for you. What do I mean when I say "overall"? Well, suppose you choose a single path for your entire park. What you could do instead is triple the width of that single path, and then add gardens on both sides. When you do that, you're increasing the area of the paths and gardens by five times! It may not seem much, but when you think about how many paths are in your park, this becomes an easy way to occupy more unwanted space and lessing the work load as well.
However, this also must be done correctly or else ugliness will plague your beautiful park. The most common method is simply placing the path without any breaks and then planting gardens on either sides. This works very effectively, but the large amount of pathing can distract from your architecture and make the whole area seem empty. A remedy to cure this is to insert small scenery in between the paths, like below.
Fountains
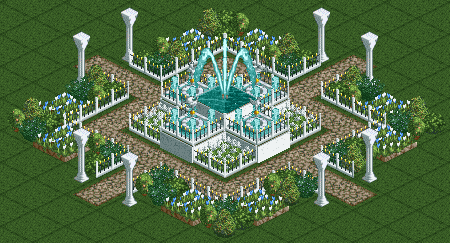
My last gap filler on the list also happens to be my favorite one, for this is when creativity runs wild. If you have a large empty space but not large enough to put a building in it, this is definitely for you. The only thing you need is to connect a small path to the area and let the building ensue.
Usually, every fountain has a path running the entire perimeter around it. I always build a path first, making sure that it's on the very outside of the space provided. This tells me how much space I have to work with for the fountain in the middle. Next is the sculpting. Think of a fountain as a 3 Dimensional statue and be sure that it looks nice at every angle. Add water, features, scenery, gardens, bushes, or pretty much anything you'd like to in order to create that masterpiece of art. Make some finishing touches with fencing and polishings and you're finished.
Well, that's it. My list of gap fillers is finished, but the game goes far beyond the list. Think of creative ways you can use to polish those tiny blank areas and feel free to use the methods I provided you for guidance as you build your park of art.
Copyright © 2003 Steve Welch