The Parkmaker's Guide:
Roofing
Sure, you may ask, "Why do I need to consider roofing? Can't I just build?" Well, if you didn't consider roofing, every rooftop in your park would look exactly the same, and since the game is from an aerial view, roofing is probably the most important part of your architecture.
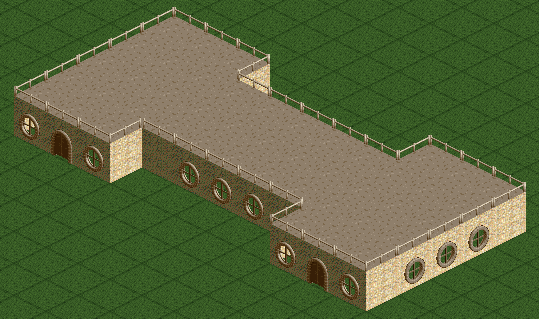
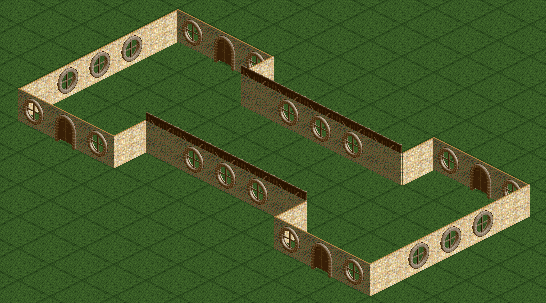
Let's begin with the basics. Below is our building base.

It doesn't look that great, and I only spent about 30 seconds building it, but it's still architecture nonetheless. This guide is going to use that first story base as the setting for many different types of roofing available. Grab your pen and paper, because you're going to want to take notes.
Flat Roofing
I believe this speaks for itself. Flat roofing is simply using floor tiles placed above the walls to make a...you guessed it...flat roof. When doing this, consider many different variations you could use to pulling it off. Perhaps you want a different roof texture than your walls, or maybe just a different color. Maybe you want to change colors of part of your roof and leave the rest of the roof the same color as the building. Whatever you choose, it's usually not complete without fencing used as framework for your picture. I selected an average-looking roof with an average-looking fence as seen below.
This makes a nice look when you don't want to put much effort into it. However, since this is a tutorial, I would be lazy if I didn't put anymore effort into it, so now I'm going to begin adding detail. From here, you could do anything with your flat roof, just make it look nice and polished. Among the many parks I've seen, I have noticed gardens, plants, chimney pipes, color schemes, statues, or pretty much anything placed on a flat roof. If you think it should go up there, try it. As for me, I settled with adding some tiles of glass roofing to shine some sun in that dark building. Once I found the colors I wanted, I deleted the regular roofing and added the glass. Ta da! I have my flat roof completed.
Sloped Roofing
Again, this speaks for itself, except this type of scenery was designed for rooves only. That's why it's usually more common to see this type of roofing than flat. Of course, with the wide variety of sloped rooves available, how do you choose which kind you want for your architecture? Simple! Select ANYTHING you want! Any type of sloped roofing will do, and if you don't like it, change it. This is completely about experimenting, and I discovered that I want TT's wonderful rooves for my building.
As you can see, the TT Rooves are an excellent commodity for almost ANY type of walls. But, just like flat rooves, this is good if you're not a hard worker. If you really want to polish it up, add more to it. Perhaps you could cut out a section of the roof and put a window and balcony there. Or, maybe you'd like to add one of the chimney pieces or gable pieces somewhere on the building. I tried experimenting with what I had. Although I'm not that pleased with the results, it still demonstrates the importance of fiddling on the rooves (pardon the pun) to get what you like.
The Mix
This is a name I dubbed for the style because it involves both flat roofing AND sloped roofing on the same building. This is the most interesting and suggested ways to go because it adds more detail and balance to your architecture.
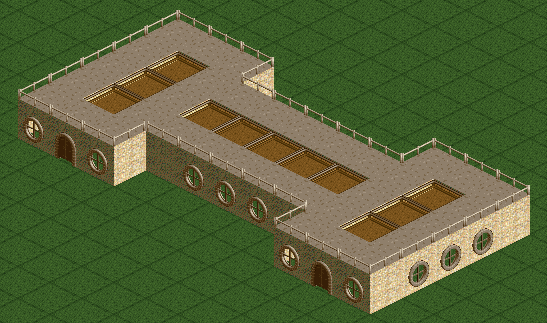
Alright, the first thing you want to do is select which part of it will be flat roofing and which part will be sloped roofing. When looking at the picture of the base building (top of the page), I notice that there is a break in the middle wall, and thus it looks somewhat like a hallway. Spotting and making differences in wall designs like these are key to determining where you want to place your sloped and flat rooves. Once I noticed that, I decided to place my flat roofing on the sides and my sloped roofing in the center.
To start, I knew that I would have to make a second story where the sloped roofing will be so it doesn't look too unbalanced and "weird." So, I began by creating a small divider wall of different texture. This is important because the divider is standing at an even level where the flat roof should be, so the second story walls will be above the flat roofing. You can choose different styles for the divider. Perhaps you want it as the same texture as your other walls. Or, perhaps a different color. Since nothing is going to be behind it, placing floor tiles there is also a helpful suggestion that gives an added dimension to the building. Here's what I chose to do:
Now that we have our divider, we can begin building the next level: the second story. Again, you may use different colors, wall textures, or even a different height. Be sure to try different things out to see what you like, and window placement is also important (although it's always been my weakness). At this stage, I also added the flat roofing I want without the detail yet.

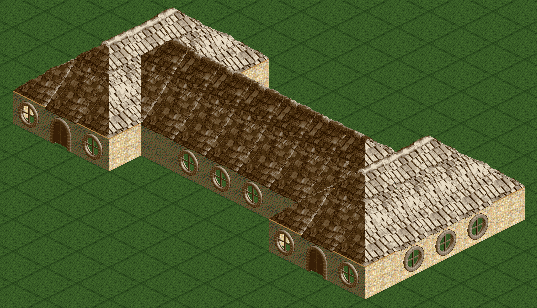
The next stage is simply finishing it off. Now that you already know both techniques to flat and sloped roofing, the next few steps will be a breeze. Add a roof, decoration, fencing, the works. Do whatever you want to make this building look great. This is what I chose:
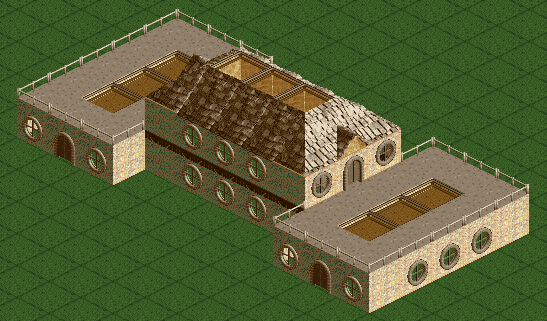
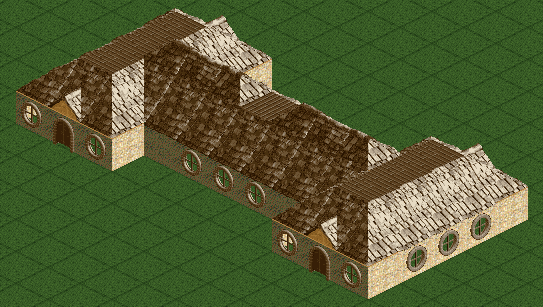
Of course, there is no right or wrong way to do a roof, so I also inverted my roof. Instead of placing the sloped roof in the middle and the flat roof on the sides, I tried placing the sloped roof on the sides and the flat roof in the middle. I did the same thing I did for the first one, including the divider and second story walls. This was my result.
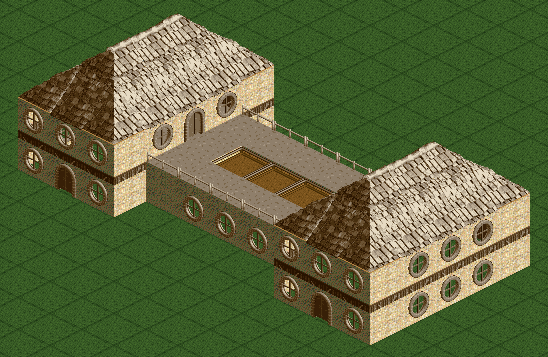
Or, if you prefer a more decorated pattern:

There you have it. These are among the top choices for parkmaker's roofing. Pick whatever you like, but make sure you remember this: NEVER have the same roofing for every building in your park. Always mix between flat roofing, sloped roofing, different colors, different textures, and so forth. Have fun with it, and maybe you'll find your own style of roofing that you prefer. Just remember to experiment, experiment, and experiment! Good luck.
Copyright © Steve Welch