The Parkmaker's Guide:
Roller Coaster Stations
Yes, it's finally here! Followers of the series have been asking for this since the beginning, and I've put it off long enough. This tutorial will delve into the wonderful world of building stations for roller coasters.
It started with my park in construction, Sickly Sewers. I had recently built triple duelers, when I realized that this will be a great opportunity for me to promote the park. Not only that, but it will kill two birds with one stone by creating another tutorial and a great station for my duelers at the same time. So, I began building the station from scratch, starting with this:
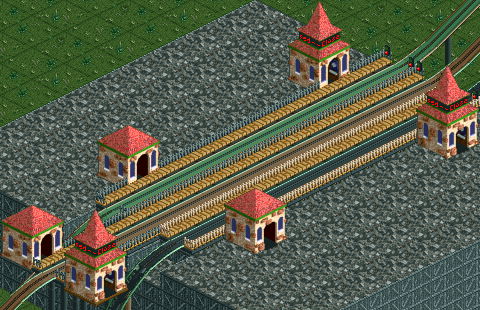
I wanted the coaster station on the ground to begin with, so I raised the land and colored it according to the style of the park. Now, we can begin construction on the actual building itself. If you remember back to Issue #7, I demonstrated how to tie all the different aspects of architecture together. Well, the same concept goes for building a station, only this time you have an obstacle in the middle - the station.
However, while this can be a burden, it can also be helpful as well. As I explained in Issue #7, the first thing to do is determine the shape you want your building to be. Problem solved already! You know that your building will have to be generally similar to the shape of the coaster station itself. It will definitely be longer than it is wide, and you will have to leave room to hide the entrance and exit. Balconies are great for doing this, however be sure to use creativity.
So, I began with my base keeping several things in mind. I knew I wanted to have part of the coasters showing so that you can see the trains launching out onto the lift hills. In order to do this, I used wall pieces that show a lot more than hide, such as poles, arches, and other almost-invisible tiles.
Another thing I wanted is balconies to add interest. I thought it would be easiest to build this over the exits, so I shaped the walls to accomplish such a task. Notice how it squeezes next to the exit, but then continues away from the station, leaving extra space in between.
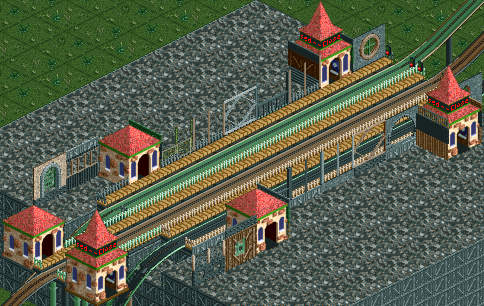
Unfortunately, I was unsure what to do with the remaining entrance and exit for the center coaster. So, I left that area somewhat open to add later. This is of course alright to do, because it allows you to discover what will look good when you finish the rest of the station.
Next comes the dividers and floor tiles. I feel I don't have to explain how essential this is to keep the building heights even, however this is also optional as usual. What's NOT optional, however, is the balcony floor (hmm, who would've guessed a balcony needed a floor?). This is a simple step, so I will just show the picture.
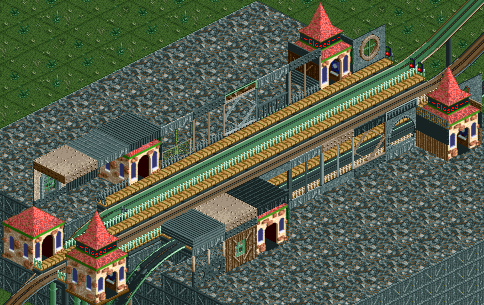
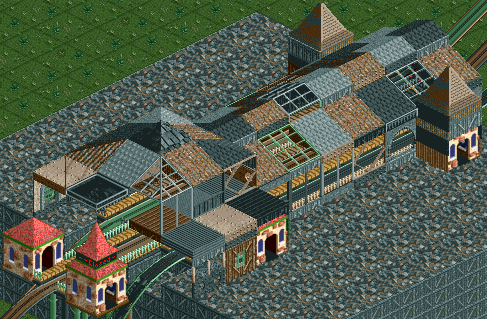
Now, I need to ascertain what I would like to do next. I have many options available, using different styles of wall decoration and roofing. I could create a flat roof where the balcony is and add on a second story where the rest of the station is. Or, vise versa. I could also add another level to both sections of the station and end them all evenly. Choices, choices, choices.
Well, after contemplating the different options available, I decided that I wanted roofing on top of the longer portion of the station up until the entrance. Using different roof options available, I wanted to add an accent to the style. So, I raised the roofing in the middle tile slightly and added walls to finish it off.
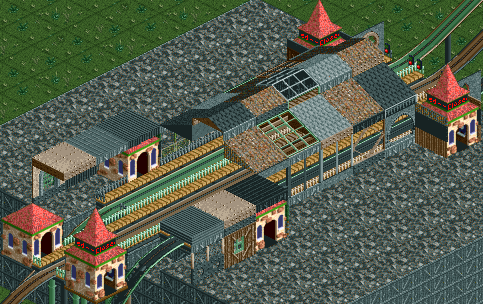
After that, covering those ugly entrances was the next step. It was a simple task, for all I had to do was build up the walls and add a nice roof on top. Try different methods for this, because there are an infinite amount of possibilities when it comes to hiding the entrances and exits.
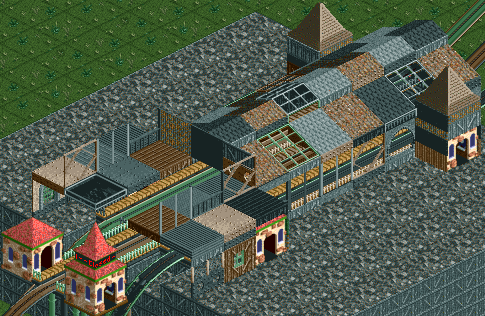
Hmm, now for that tricky space between the two entrances and the very end of the station. What, indeed, would go well there and how do you find out? Well, you may have heard frequently in my tutorials the term, "experiment," and here's especially where it comes into play.
Since I was so unsure what I wanted to put there, I tried out different things and determined what I like. Flat roofing, angled roofing, and anything in between. Once you try something out, take a good look at it. Notice how well it balances with the rest of the station, and whether or not you can picture this as your final product. Then, delete it, try something new, and repeat.
I narrowed it down to two different styles I liked, I call A and B. Observe.
A.
B.
After much deliberation, I decided to select picture B because of how it balances with the rest of the station, and I can picture trains launching out of station B more than station A (sounds stupid, I know, but you have to consider all angles of the problem).
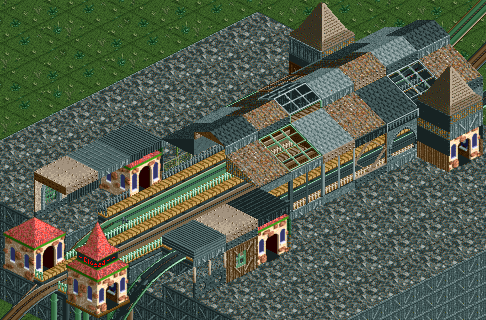
Well, with that dilemma out of the way, the next portion I had to do was the other end of the station. After much decision making, I thought a second story next to the balconies would be best. How do we build a second story? Build a second set of walls, duh!
But what kind of walls work best? Another problem, for there are many different types of walls to choose from. Solid, windows, doors, and much more. Eventually, I reached the conclusion that I wanted the same type of walls I used in the middle first story. So, I built up the second set of walls surrounding the section as seen below.
It's beginning to shape up, and our station is becoming more and more completed! I'm still not sure what I want to add at the incomplete end, but at least I have another step to go before worrying about that.
What step is next? Well, doesn't something look a little incomplete on top? Maybe roofing perhaps? Oh yes, it's the second story rooves! You can add any type of roofing you want, but I decided that angled looks best.
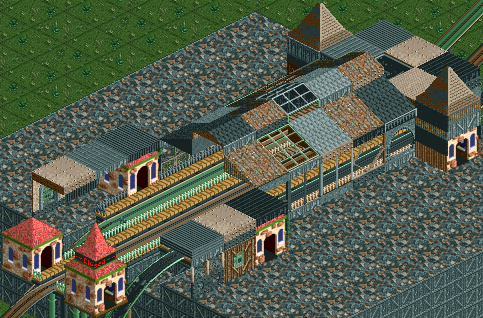
Well, now the task I've been putting off is upon me. I must make a decision and I must make it now. What do I want to add for the last remaining portion of the station? Oh, the agony of decision making!
To begin with, I started by figuring out exactly what I wanted to accomplish. I wanted to completely cover both the entrance and exit, and I wanted to do it while still maintaining a good look. Now, I must determine how to accomplish my goals in an easy and effective way.
Since I knew I wanted to cover both the entrance and exit, I started with the roofing. I didn't want to continue the same type as on the other side of the station, but I wanted to build a similar effect. It also had to be taller than the other side, for the entrance is high and hard to build over. In the end, I came up with this:
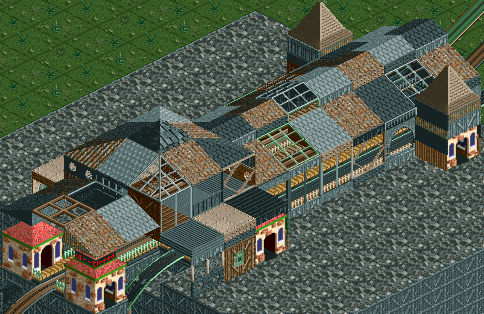
The rest is a breeze! Now that we have the roofing, all we need is walls, being sure to add proper decoration in order to maintain the style of the park. Little touch ups here and there, and hurray! We're finished!

Phew, that was a large project! Now, take a load off, sip some lemonade, and bask in the magnificence of your new roller coaster station. But don't get too comfy, we're going to have to theme the coaster next. I'll be demonstrating that in a later edition of the Parkmaker's Guide. So, until then, practice building stations and as usual, don't be afraid to experiment!
Copyright © Steve Welch