The Parkmaker's Guide:
Balconies
So, you've read Issue #4: Wall Decorations, eh? Well, have you tried out all of the choices and mixtures I demonstrated? If you have, you may be wanting to find another method to decorating that big plain wall you have in your park. For this reason, I'm going to display yet another wall decoration - the balcony.
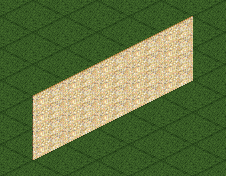
How do you know if a balcony is the right choice? Well, balconies are usually used for walls two stories or more with at least two or three tiles of width available. The ideal wall you want to decorate may look somewhat like this:
Outward Balconies
The most common balconies in use is the outward balcony. You'll see this in many parks and is a very easy and useful way to add an extra spice to any building. These types of balconies protrude from the wall at varying heights and widths. Because of aesthetic reasons, I would suggest building most of your balconies about halfway between the bottom and top of the wall reaching only one tile away from the wall.
To begin, we must take down the second story in order to build from ground up. First, delete the pieces of wall you plan to build your balcony at, including both first story and second story. Next, build a wall perpendicular and adjacent to the remaining first story so that it forms an "L" shape. Do the same on the other side, and connect the two freshly made walls with another. Now, you have your base.
Next comes the divider. This is important because it raises the wall that doesn't have the balcony so that everything builds up evenly. If you didn't have a divider, some portions of the wall would be slightly higher than others, making it somewhat difficult for roofing. Add the platforms that will be your balcony and you'll be finished with the first story.
Since the instructions may be slightly confusing, I've provided a pictoral guide of what it should look like thus far:
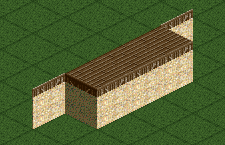
Notice that I used a different texture for the divider and balcony floor. This is not necessary, but make sure you experiment with different ideas involving color and textures. I used a nice wooden wall and floor that accompanies the brick very nicely.
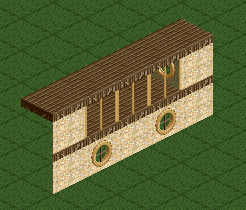
Next comes the second story. This is very simple because it's just like the second story that we had previously before we deleted it. Add a straight wall from side to side without breaking for the balcony, and you'll be finished. Now, look at your gorgeous piece of wall:
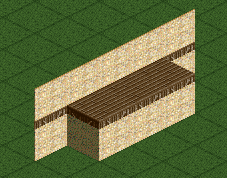
Hmm, maybe it's not THAT gorgeous. But we can do something about that. Add some decoration I showed you in Issue #4 with wall decorations. Windows, colors, textures, stripes, add anything you desire to make a great looking wall. And, since the balcony itself is somewhat of a roof, you can refer to Issue #3 about different variations of roofing for the balcony floor. After I was finished adding everything, my final result was below:
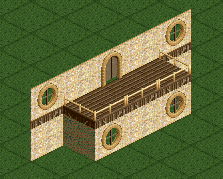
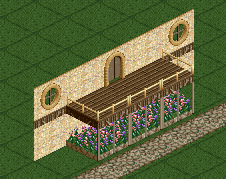
Looks much better, doesn't it? If you'd like, you may even expand from there. Try different things, like putting a roof over the balcony itself to make it more enclosed, or replacing the front wall with poles and have something running through it. Remember, experimentation is the key to great parkmaking. Here's what I tried with my balcony:
Inward Balconies
These balconies are less common but still a great effect. This time, they require at least two stories because they're built over the first story and into the second one. Again, I would recommend only one tile depth for these balconies so they don't reach too far into the wall.
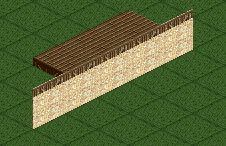
You begin building an inward balcony similarly to an outward one, except you don't have to delete anything on the first story. However, delete your second story and build your divider and floor nonetheless. This time, build the floor on the other side of the first story so that it's pointing in towards the building instead of away. It should look similar to this:
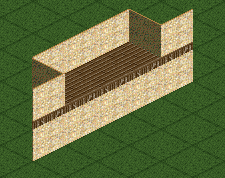
Now, for the second story. Align your wall so that it follows the shape of the divider and balcony floor, similar to the first story on an outward balcony. Confusing? That's what pictures are for!
Again, add decoration, fencing, and your own spin of creativity, and you're finished! My finished product looks like this:
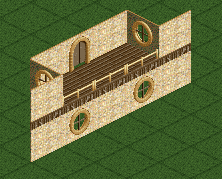
Now, doesn't that look a lot more interesting than a plain old brick wall? Of course it does! And it doesn't end there. You can add whatever you want to this basic template so that it looks magnificent. I tried making a flat roof over the balcony to create a small alcove. Ta-dah!
Or if your wall has three stories, this would go great as your second story decoration. Just do the same procedure as I demonstrated, add the roofing like in the picture above, and build another wall on top of the roofing. It's easy and effective. What more could you ask for?
Of course, I've only shown you the basic procedure for building balconies. Always feel free to change whatever you want with my methods to fit your style more accordingly. Nobody wants to see the same boring balcony over and over again in every building you create. Mix it up and as always, don't be afraid to experiment!
Copyright © Steve Welch